


Vault Dweller from Fallout 1 (Vault 13 Jumpsuit Version 1.0) Cosplay Log
- shiimapan

- May 23, 2019
- 5 min read
Updated: Jan 16, 2021

I decided that for my very first Fallout costume I wanted to be the Vault Dweller from Fallout 1, with that fresh outta the vault look! I started working on this costume February 2014 and finished it the next month in time for WonderCon that year. This is also the first big project I made using my serger, and hot damn did it make putting this together a breeze... I mean, at least the sewing parts anyways, as I will forever suck at patterning haha. Also note, yes I'll have a blog with Version 2.0 up later on as I used a different fabric and a lot of changes had to be made. I still plan on making Version 3.0 sometime this year, which will hopefully be the final one as I have other jumpsuit styles I still want to make! But I can't help it that this one is my baby.
Note: I'm not open to commissions.
Leggings


4 way stretch cotton blend fabrics were sourced by me at M&L Fabrics in Anaheim, CA. I used to shop there A LOT and pretty much fell in love with the fabric (ok, maybe not so much with the price haha) and knew it would be perfect for this!
I didn't take any progress photos of the leggings because I didn't think it was very exciting? lol For the pattern I bought a pre-made unitard that ONLY had a back seam and inner leg seam, as I didn't want any seam lines going down the sides the leggings. I cut apart the unitard, then pinned and traced it to pattern paper, did a few mockups to adjust as needed, and once I was happy with it traced that onto pattern paper again so now I have a good base pattern for leggings that I could use for future costumes too! I also recommend adding a stirrup foot or elastic on the bottom of your leggings to keep it from riding up your legs, because it will if you don't!
I used to not do pattern mockups for any of my costumes, which was a huge fucking mistake as I'd end up wasting SO MUCH OF MY NICE FABRIC!! So if you're not sure, always do a mockup using cheaper fabric to test things out, especially if you suck at patterning stuff like me, this always takes me the longest part to figure out when it comes to making a costume. 💀
Top - Pattern Test Fit


Super quick test fit using Kwik Sew 3103 (Girls' Leotard and Unitard) as a base, as it has a seam in the front which I need for the zipper, and yknow, so I can get out of the damn jumpsuit.
Top - Pattern Adjustments


Next up: adding the pieces for the collar and front bands, as they need to be yellow. 1st photo: I marked the parts then cut them out, 2nd photo: final pattern with seam allowances added. I only did 1/4" seam allowance (I usually do 5/8" out of habit) as this is all sewn on my serger.
Collar - Mockup


Again, don't be afraid to test things out before using your actual fabric! I used firewolf826's Seamless Trim Tutorial for the collar, and I've used it plenty of times before for other costumes, but never on stretchy fabrics haha. But I can say that depending on the stretch fabric it can totally work, and this has really helped give my jumpsuit the nice, clean seam lines I wanted!
Collar - Corner


I don't quite remember why I took these photos aside from to show what the inside of the collar looks like, I think it's because I didn't sew it exactly on the seam lines I had marked? But again, this is why you do mockups.
Top - Progress


Okay, now onto the actual thing! The very first photo shows the most terrifying part, having to cut into the corner of the fabric haha. I baste stitched the corner so wouldn't have to worry about it sliding around when I ran it through my serger. Tip: press your goddamn seams and do both sides, I always use a press cloth (scrap broadcloth is my go-to) for specialty fabric. Oh, also the 5th photo shows the zipper I used lmao, I really wanted a yellow zipper with metal teeth for some reason.
Top - Test Fit


It went from a vest to cardigan! I'm also embarrassed to say that I didn't know how to do a proper collar facing on this (for shame!!), which was fixed when I started on Version 2.0 ^^;
Test Fit


Lookin' good, not bad for babby's first bodysuit! So what's left? The most important part, the '13' on the back of course!
Stenciling - Making The Stencil


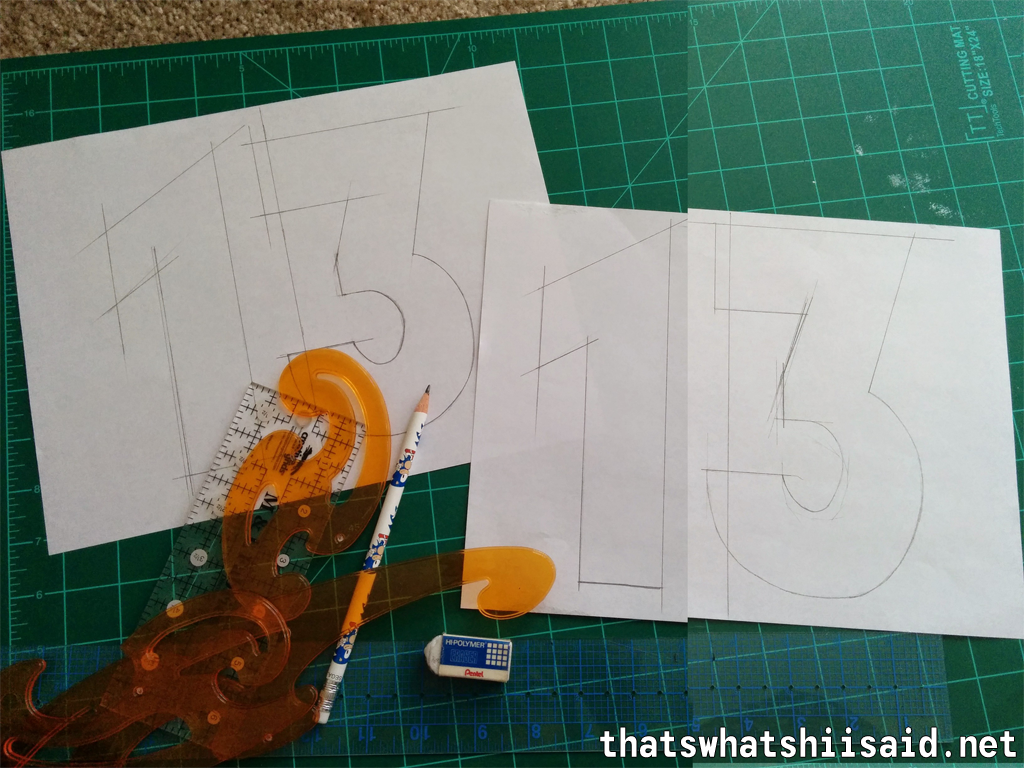
I can't draw for shit but I tried my best to make my own '13' based on that one image of the Vault Dweller. French curves will save your life. Here's Albel being the bestest cosplay helper, and super excited to sit on paper. I still miss him every day. 😭
Stencils - Good to Go!


Wait a second, why 2 of them? Because I got Varnani hooked on Fallout and she wanted to make a jumpsuit too, hehe. This was a very interesting lesson in trying to scale a pattern to fit another person as I'm 4'10" and she's 5'8", after much crying and frustration we did the thing though!! Huzzah! I don't ever wanna do that again lmao Also pictured: the paint I picked out and the secret ingredient: textile medium, which basically turns any acrylic paint into a fabric paint. Super handy, as textile paint as it is comes in a very limited color palette and is more expensive too.
Stenciling - Oopsie


Sooo of course there was some bleeding as this required multiple coats and I should have used something other than the lightweight poster board for the stencil. I cleaned up what I could using a royal blue color (mixed with textile medium, of course) and a small detail brush, just doing my best to make the lines as crisp as possible. It's honestly really not noticeable unless you're right up on it and know what to look for. lol
Stenciling - Take Two!


I'm not sure why I just didn't use contact paper for this LOL I think I didn't have any on hand at the time, so instead I used blue painter's tape and made a 'sheet' on my cutting mat, then traced the stencil I had cut out of lightweight poster board. You can see that the numbers are a helluva lot cleaner, I don't even think I had to do any clean up this time around either.
Wow, so easy amirite?! I used to get A LOT of questions about this costume, so hopefully someone out there finds this helpful. The simplest looking costumes are hella deceiving, because it takes sooo much work to make it look 'simple' 🤪 a lot of cosplay is trial and error, so any mistakes I've made with this one I fixed when I started on Version 2.0. You can check out some of my fave photos here, I'll get the Dogmeat plushie progress log up next, then back to more Vault 13 jumpsuit stuff!
Thanks for reading! Please 'heart' this post and leave a comment! If you have any questions just let me know in the comments and I'll get back to you as soon as I can, and don't forget to follow me on my social media~ click-y links are at the top of the page. See y'all in my next blog post!
💖 shiimapan

Comments